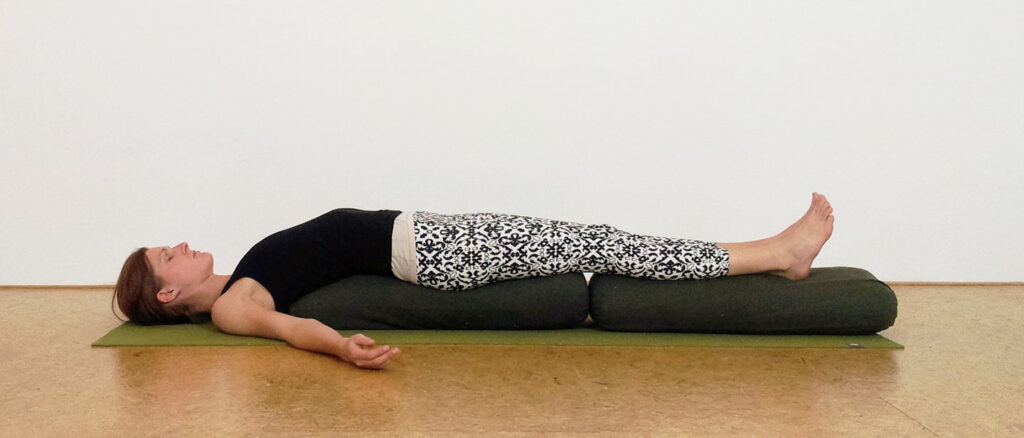
Rianne wolswinkel logo

Pose of the Month January:
Supported bridge

Start the new year with some quality you-time with the supported bridge restorative practice. Gently opening the chest to rest and energize yourself.

Nourish and uplift yourself with supported bridge.

The new year has arrived, maybe with new years resolutions. Whether you have them or not, it will be worth while to allow yourself to have some more you-time this year. And not just being alone watching your favourite TV show or movies, but quality rest and quiet time.

Doing some restorative yoga is the perfect way to enjoy some of that you-time. As it allows your body to rest and restore itself, while you’re not interfering.

For January I’ve chosen supported bridge as pose of the month. This pose gently opens the front of the body, mainly the heart space. The effect of heart/chestopeners tends to be uplifting and energizing yet nourishing. This might be just what you need after busy holidays and at the start of a new year.

supported bridge restorative yoga pose

How to practice
Supported bridge:

There are 2 options to be in this pose. To set it up, take 2 bolsters and place them behind each other. Place one block on each side where the 2 bolsters meet. You can place a blanket at the top end to support the head. Have belt nearby to tie the legs together should you wish to do so and eyepillows to cover your eyes, place on your belly or in your hands.

Now lay yourself down on the bolsters. Slide yourself up so that your head is on the blanket and the shoulders are almost resting on the blanket. The bolster should support the chest, allowing it to gently open. Make sure the edge of the bolster is below the breastbone/shoulderblades and not too low. Your neck needs to be long to be able to breathe in a relaxed manner. If the head tilts back because the bolsters are too high, then elevate the floor with blankets below your head and shoulders, until you’ve found a suitable height.

Feel whether it is more comfortable to rest your legs on the bolsters, or if you want to bend your knees with feet resting on the blocks that are on either side of the bolster. If your legs tend to roll off the bolster, use a belt around your upper legs to keep them together. This way you’ll be able to fully relax them. Or tie your legs together when the knees are bent with feet on the blocks.

Be comfortable and enjoy!

Once you’re in the pose, with your shoulders slightly off the blanket, take a couple off deep breaths. Feel whether your shoulder are sinking towards the floor. If they are not fully supported after a couple of breaths, move yourself up a bit until they are. Make sure the bolster is still supporting the chest. If it feels more like support for the mid-back, you need another blanket below the head and shoulders to elevate the floor.

Then wholly relax and bring your attention back to the breath. Stay in the pose for as long as you like, but at least 5 minutes. Allow the chest to gently open and your body to surrender into the support of the bolsters. Passively observe the rising sensation and space of the inhale and the falling sensation and letting go of the exhale. Notice whether there is movement of the ribs in all directions, upwards, to the sides in into the bolsters.

When the time has come to come out of the pose, bend your knees and place your feet on the floor. Lift the pelvis of the floor and slide the bolsters away from underneath. Slowly bring yourself down to lie flat on the floor and observe the effect of the pose and the change after the movement. Whenever you’re ready, roll to the side and bring yourself up to a seated position for a few breaths. Then continue with your day.

If you enjoy these kinds of practices, check out my online self-guided journeys. I’ve recorded The Art of Not-Doing restorative packs for you. With these packs you can choose which 20 min restorative practice you want to practice. It also includes separate audios with a different guidance once you’re in the pose, to vary the practice.
You can find them here in the shop.